
How to set up the Intel Joule on a Mac
I spent a stupidly long time trying to get my Joule set up for the first time using primarily Intel’s documentation, so I’ve decided to write a post detailing how exactly to do it on a Mac. I’m currently running macOS Sierra 10.12.4 on a Macbook Pro 15inch late 2016 model.
When I got the Joule I really just wanted to just SSH in to it and use it like a Raspberry Pi and fiddle with some things connected to the GPIO pins. However the OS that is default to the Joule was confusing to use and establish an SSH connection with or even connect to the internet on. I looked for alternatives and came upon Ubuntu Core, which is designed for IoT devices like the Joule, however that was not really what I was looking for. It is relatively easy to set up SSH, and Ubuntu Core is probably really good for IoT devices but it gives minimal permissions limiting access to GPIO pins and I didn’t want to learn how to use the snappy system to install stuff. Thats how I decided to finally install Ubuntu Desktop to give me an interface I’m actually familliar with.
What Will Be Covered:
By the end of this tutorial we'll have an Intel Joule x570 with an updated BIOS and Ubuntu Desktop installed. In my next post I'll also briefly go over getting the GPIO pins functional. The Joule comes with almost nothing in the box, you will need a bunch of things to get it running well. If you are using one of the newer Macs you will need at least one or 2 USB-C to standard USB converters.
For some other resources, Ubunto has a pretty good guide for here
Intel's own documentation gives a good foundation but is a little difficult to follow, it can be found here
Table of Contents:
- What you need
- Running VirtualBox (get windows 10 setup on your device)
- Flashing/Updating the BIOS
- Installing Ubuntu Desktop
What You Need:
Hardware
Red: Not Included With Joule
- Intel Joule x570 or x550 (I've only used the 570)
- USB-C to USB cable
- 12V power source
- microUSB to USB cabel
- USB Keyboard
- USB Mouse
- USB Flash Drive you are willing to erase
- USB hub, the Joule only has one standard USB, this is needed to plugin a keyboard, mouse, and flashdrive at the same time Amazon
- micro HDMI cable
Software
- Virtual Box and USB 3.0 Extension
- Windows 10 ISO File
- Intel Joule BIOS 1F1 *Downlaod on Windows 10 Virtual Machine (Contains driver you will need to install as well )
- Ubuntu Desktop for the Joule
Running VirtualBox
To begin we have to install VirtualBox, the extension, and download the Windows 10 ISO file. This is so we can get a Windows 10 system running beacuse it is required in order to flash/update the Joule’s BIOS which is apparently necessary.
Download the necessary files linked above
Install VirtualBox and the Extension
Create a new VirtualBox using the Windows 10 ISO file
With all this done, you should get a screen from VirtualBox like this:
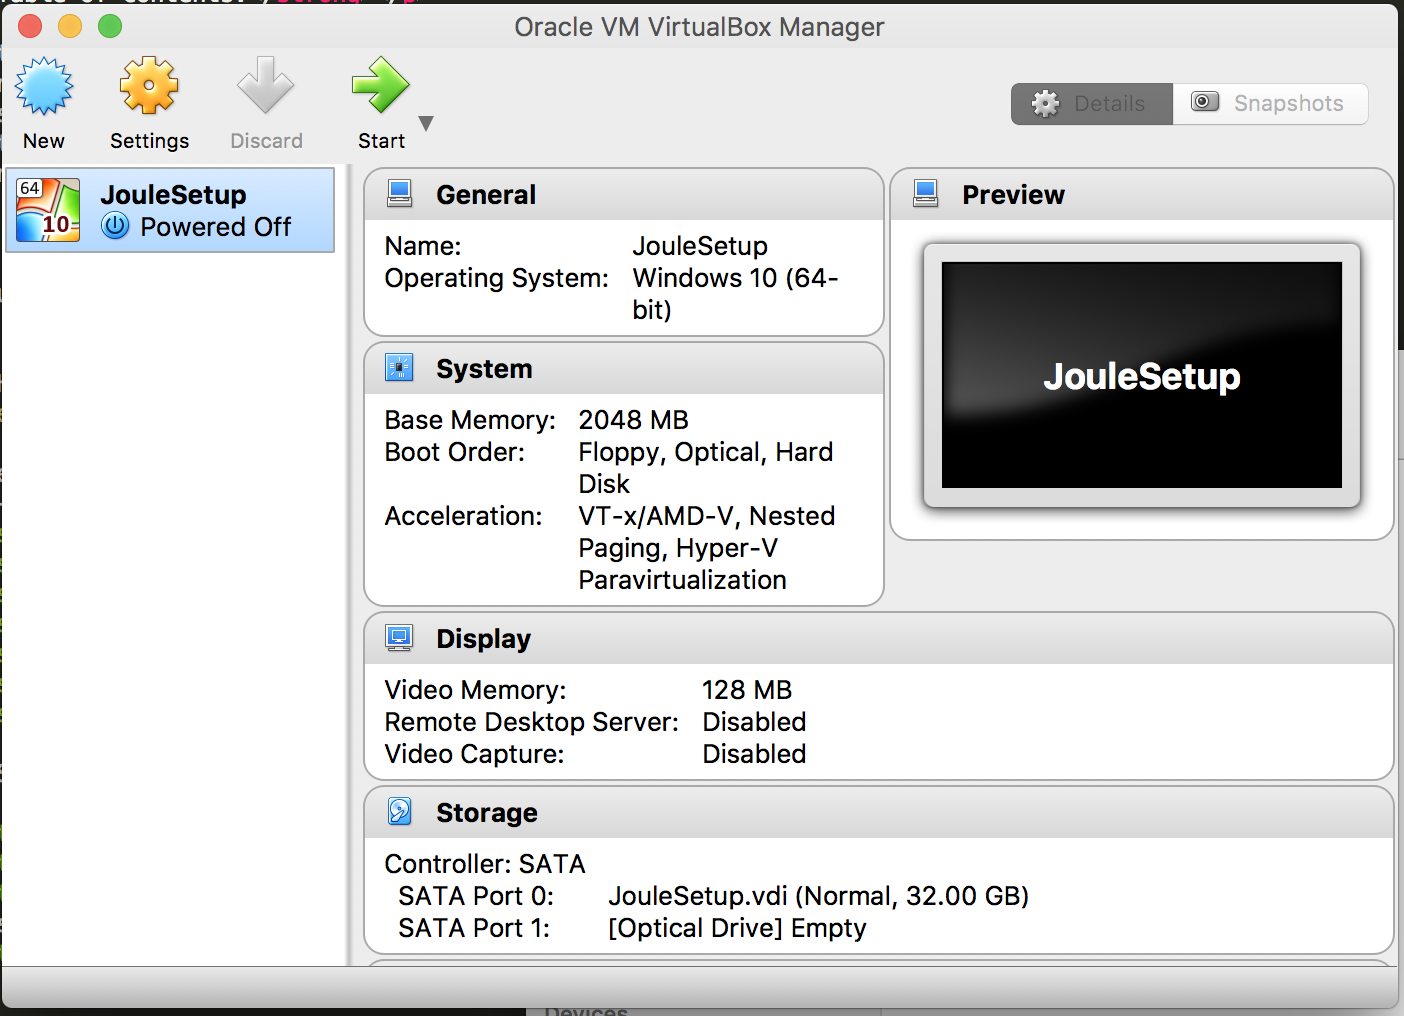
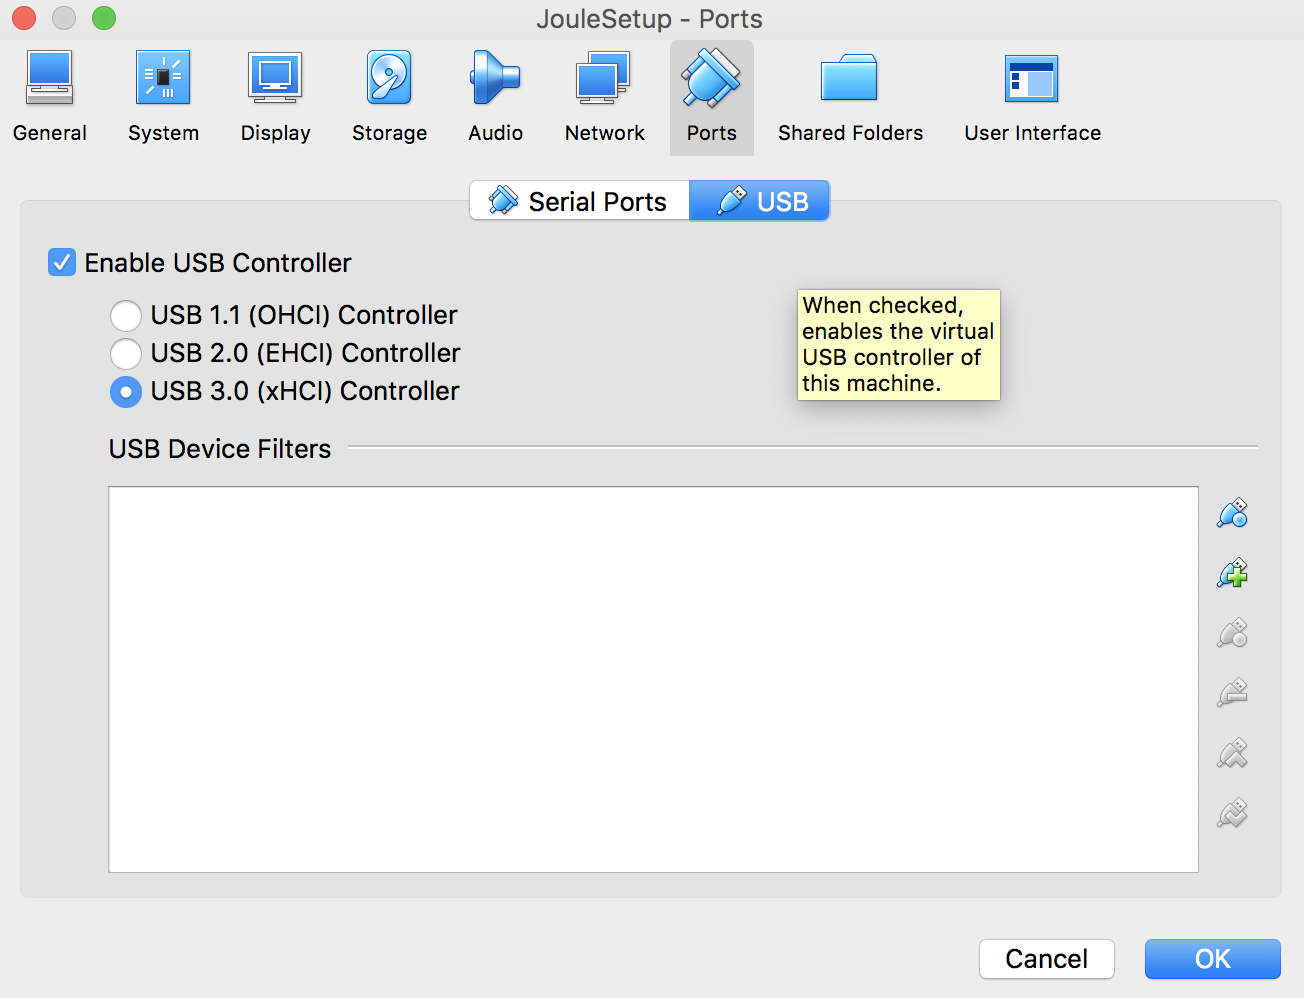
Click settings in the top left of that screen and navigate to the ports section. From here make sure in USB that UBS 3.0 is selected. If you can’t click USB 3.0 you likely have not installed the Virtual Box Extension
Run the Windows 10 Virtual Machine (VM) then download and unzip the 1F1 BIOS.
Flashing/Updating the BIOS
Now we have to install the Flash Driver on our VM so we can detect the Joule when we plug it in.
Note: If you run in to any issues check intels documentation on these steps here
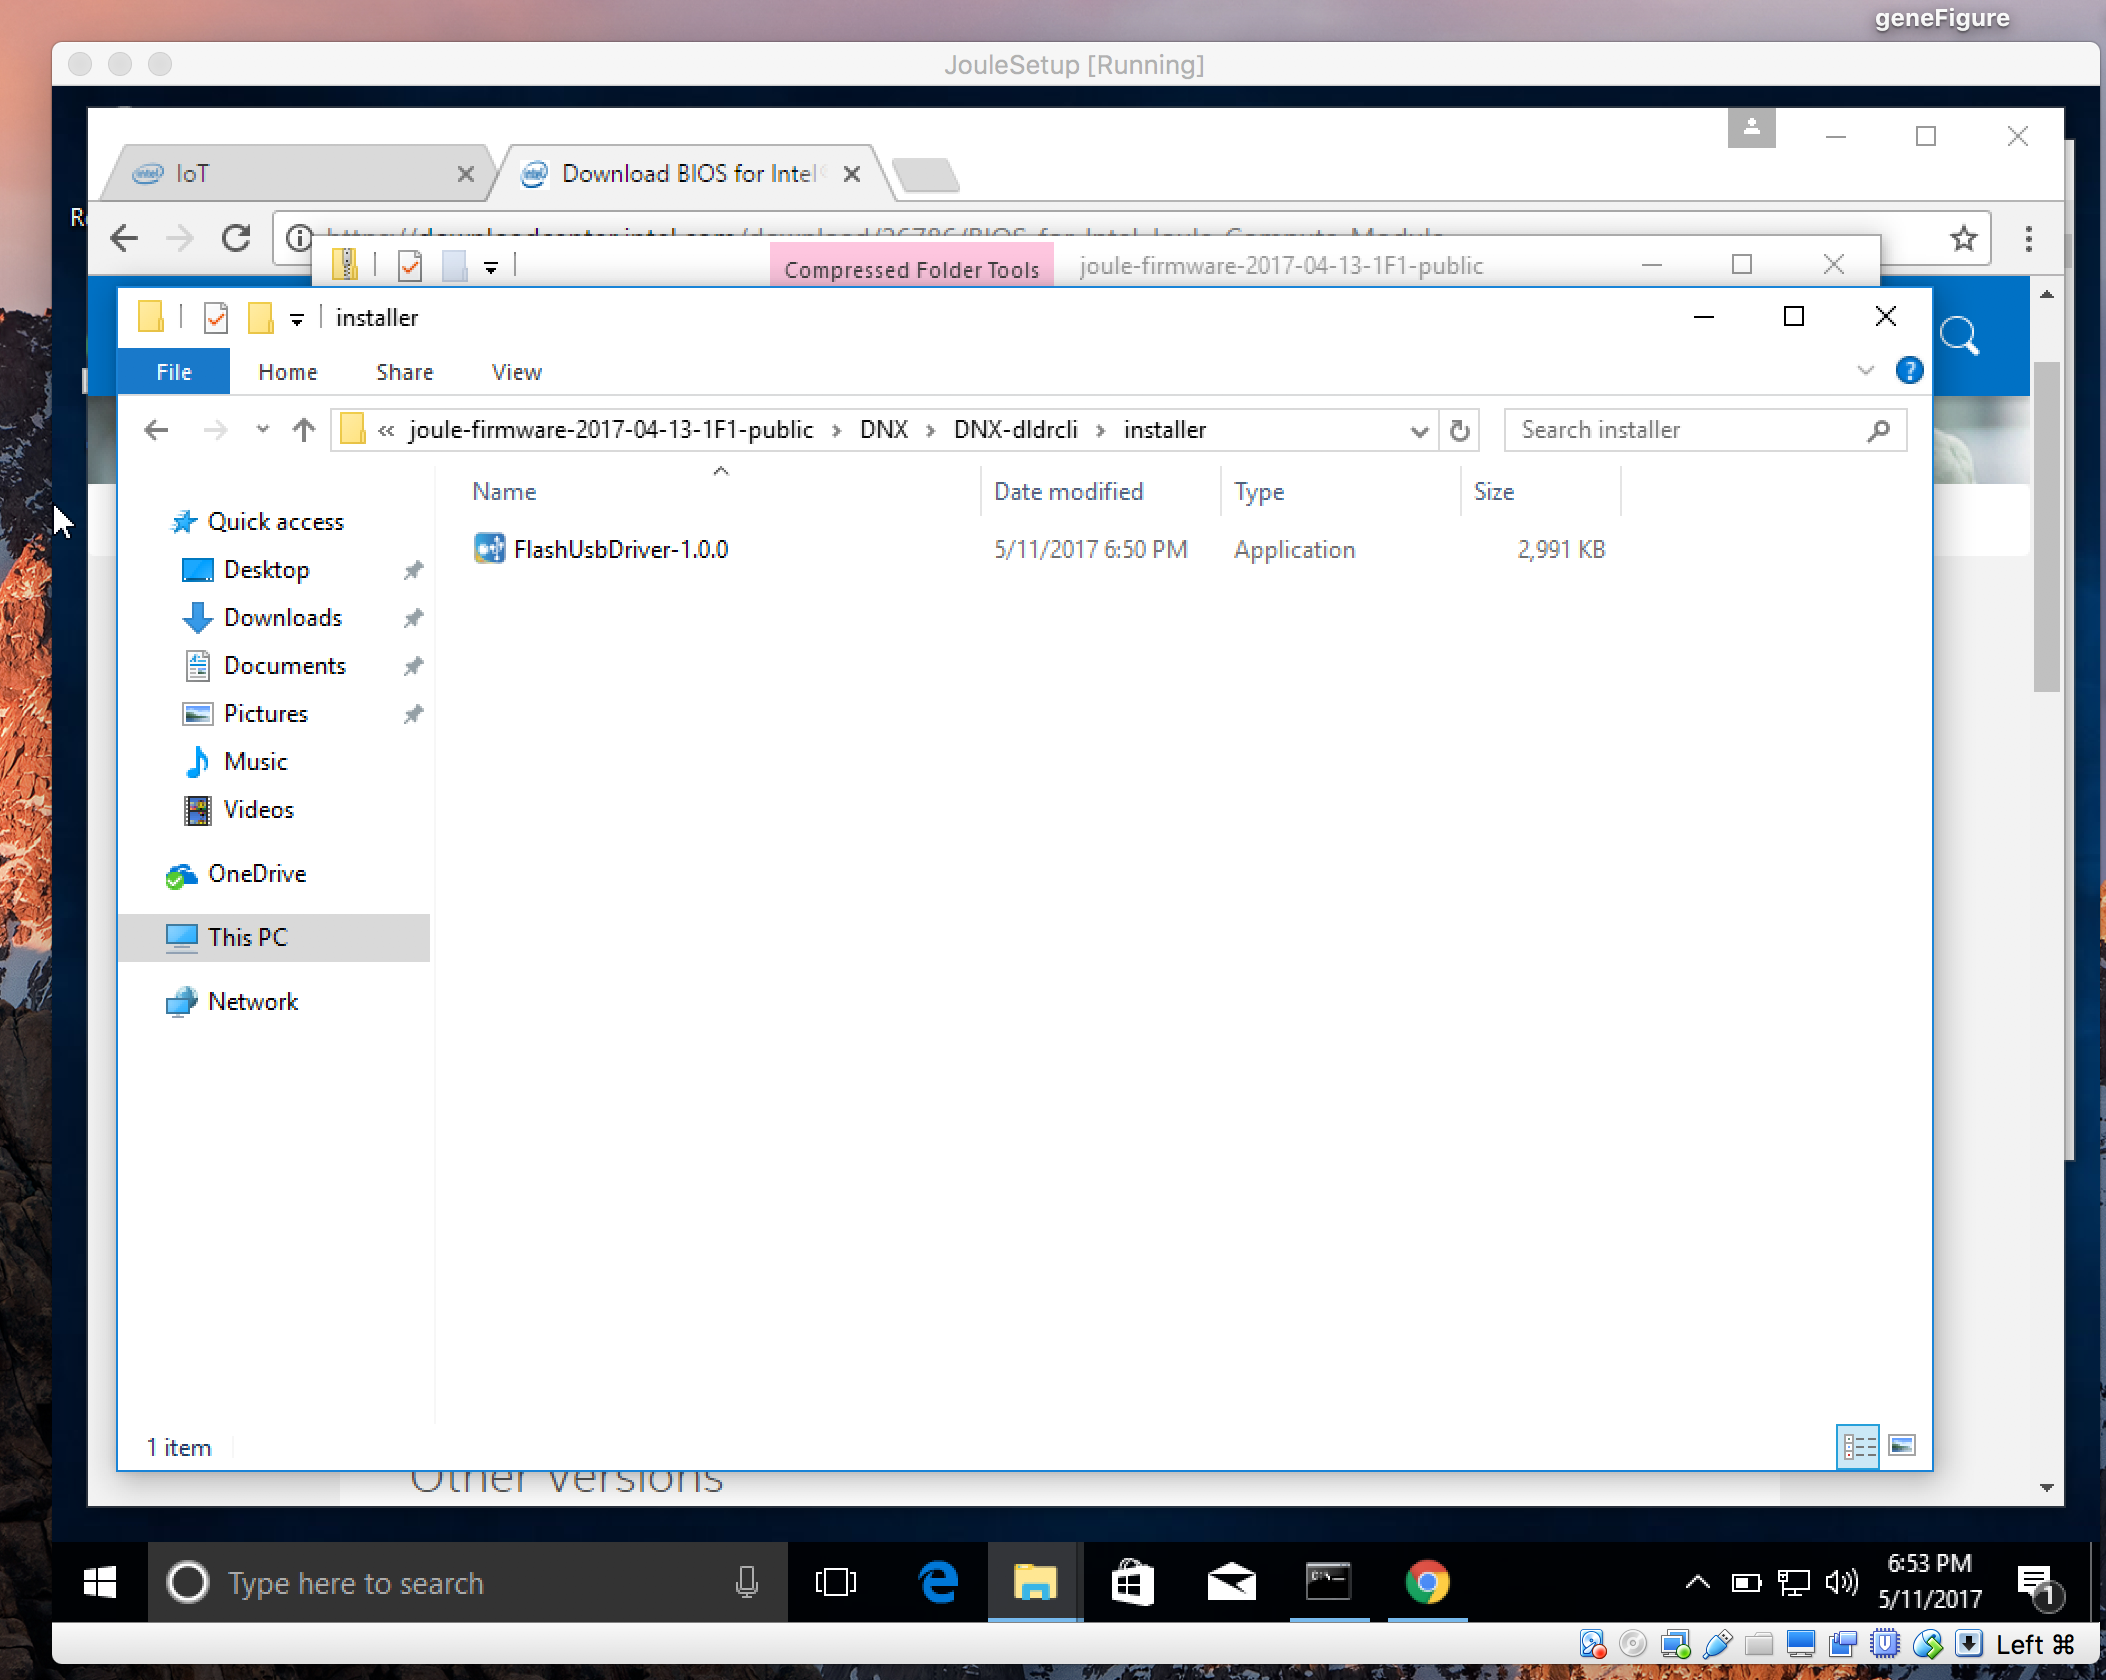
Open the 1F1 Bios folder you unzipped and navigate to DNX>DNX-dldrcli>installer where you should find a FlashUsbDriver-XXX.exe file. Open the .exe file to install the driver.
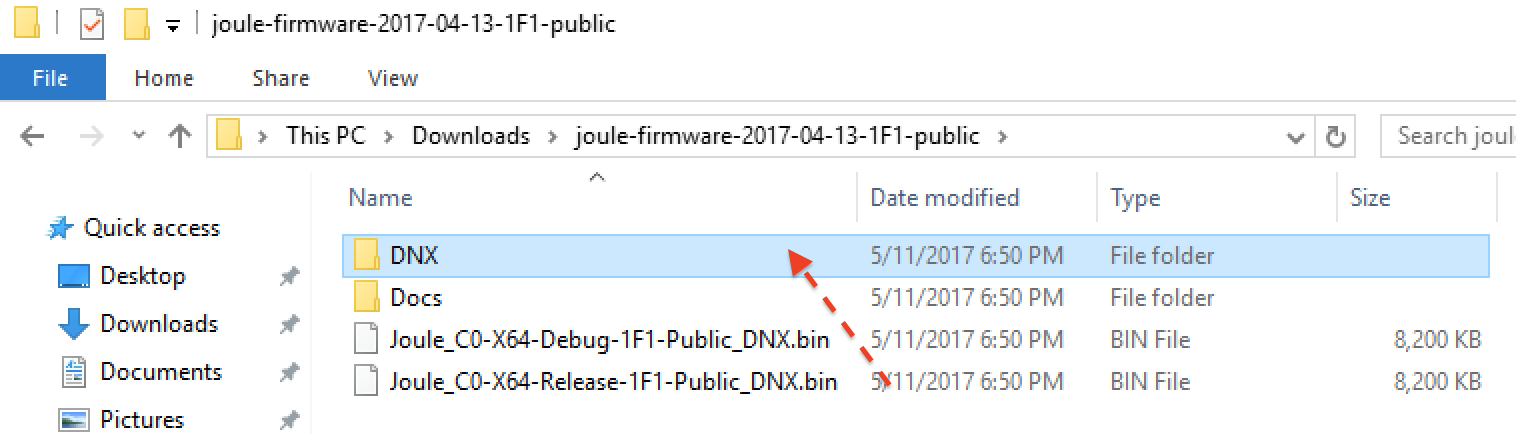
Now go back to the main directory of the BIOS folder and move one of the two Joule_C0-X64 bin files in to the DNX folder. It doesn’t really matter which.
Now we are finally ready to actually update the BIOS. Grab your joule and DO NOT PLUG ANYTHING IN YET.
First: Hold down the DNX button on the Joule located on the top right, seperate from the other 2 buttons.

Now, while holding down the DNX button, plug in the 12V power supply and THEN release the DNX button. The device should now boot in DNX mode. From here plug the Joule in from the USB-C input on the Joule to a USB port on your laptop.
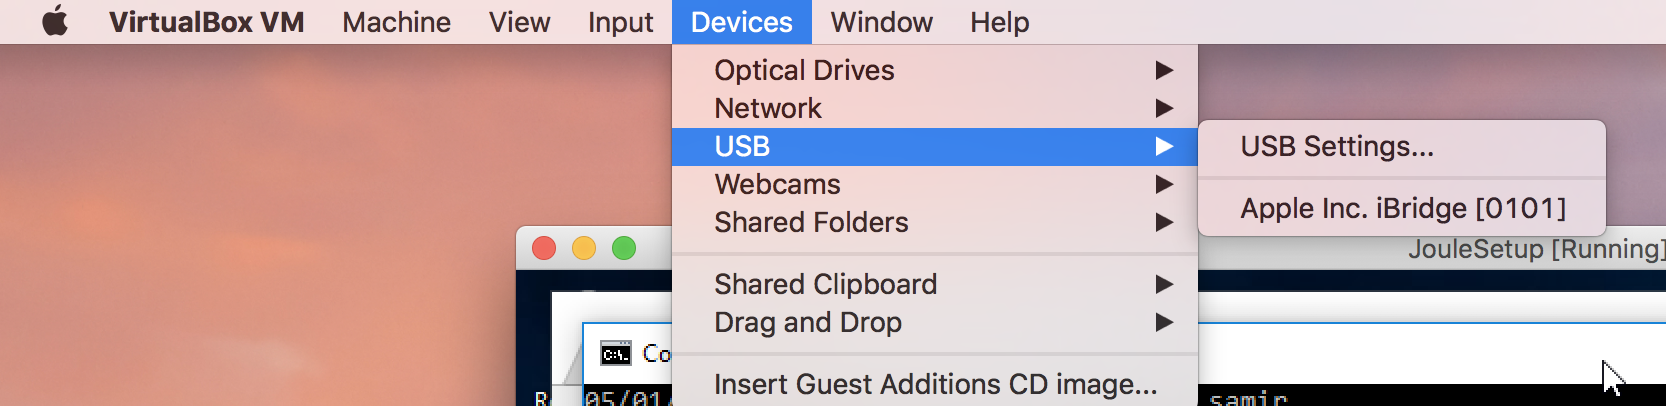
Now on the Virtual Box go to devices, and select the USB device that looks like it is the Joule. It should NOT be Apple inc. Bridge [0101], there should be one more device that is the Joule. Note that in the picture below I do NOT have the Joule connected, so it does not show up.
Open Command Prompt on the VM and navigate to the BIOS folder you downloaded. In command promt to list directories and see your current directory type
DIRChoosing a directory is the same as in terminal with the “cd DIRECTORYNAME” command. After navigating to the DNX folder inside the BIOS original folder, you are now ready to actually flash the BIOS. Type the following, replace FILE_NAME with whatever bin file you moved in to the DNX folder earlier.
Flash.bat FILE_NAME.binFor example I did this:
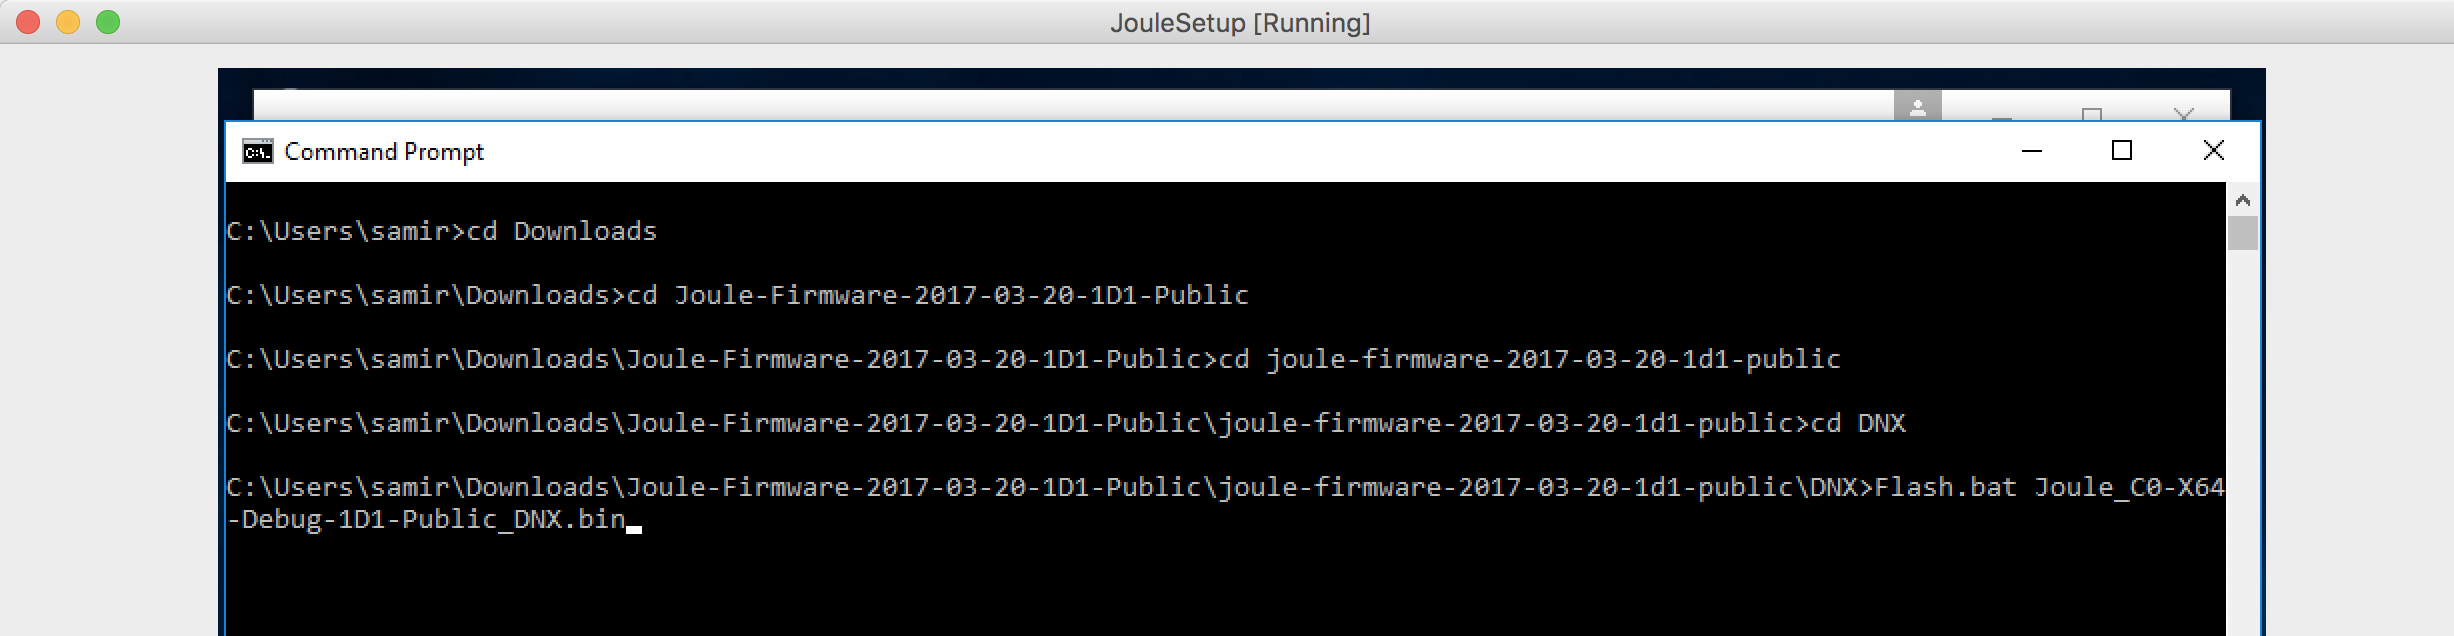
After running the last command you should get an output like this:
===============================================================================
 Intel(R)  Flash.bat version #1.1.14
-------------------------------------------------------------------------------
- Provisioning the eMMC...
  - WARNING: Already provisioned!
- Checking for RPMB...
- Downloading the BIOS...
- Clearing NvStorage...
===============================================================================
YOU WILL RUN IN TO ERRORS IF YOU DID NOT ENABLE USB 3.0 ON VIRTUAL BOX AS DESCRIBED BEFORE
Now just unplug and powerdown your Joule, we’re going to install the OS next.
Installing Ubuntu Desktop
The first step is to set up your USB Flash Drive with Ubuntu Desktop, and Ubuntu does a fantastic job documenting it. Please use their instructions here
With your Joule still turned off, connect the USB hub, keyboard, Flash Drive with Ubuntu Desktop, and connect the HDMI to a moniter or TV. Now plug your Joule in to the power supply and immediately hold the F2 key on the plugged in keyboard. You may need to release F2 and immediately hold it down again if nothing is happening. This should load the boot manager and you should get a sceen like this:
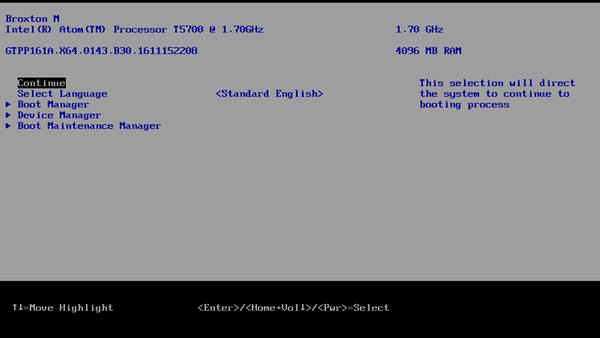
Using the keyboard select bootmanager and then boot from USB device. After some time if you formatted the flash drive correctly you should be prompted to install Ubuntu or try without installing. Select Install Ubuntu Desktop, and then just follow the onscreen instructions to finish installation, it may take some time.
Ubuntu Desktop is now installed and you have a functional Joule!
–Samir